Moving the application to a device
There are several ways to get an application to a device. This section focuses on copying the
application to the device instead of packaging it.
Upload via USB
This section explains how to
upload an application to a device using an USB cable and a
memory card. If you have a memory card inserted on your device, do as follows:
- Plug a USB cable into your device and on your computer.
Your system recoginzes the device as a new USB disk drive.
- Copy the binary application file (in this case
called helloworld) to the device.
- After copying the file, unmount the disk drive and remove
the USB cable from both devices.
- Your application is now installed in the device, but not
yet ready for execution. In order to execute it, open X-terminal
and run this command (mmc1 for the internal memory card, mmc2 for the removable memory card):
$ run-standalone.sh /media/mmc1/helloworld
Upload via Bluetooth
In this case,
your computer needs to support Bluetooth (for example, a Bluetooth dongle).
- From your computer, select the binary
application file (in this case helloworld)
and send it via Bluetooth to your device.
- The device will display a warning that a file is being sent to it.
Choose 'Save' and select the name and
directory where you want save the file.
- Your application is now saved to the device, but not
yet ready for execution. In order to execute it, open X-terminal
and run this command (this example assumes that the file is in the MyDocs folder):
$ run-standalone.sh ~/MyDocs/helloworld
Upload via WLAN/SSH
First of all, you need a wireless infrastucture, such as a wireless router, or you can choose to have an ad-hoc connection between the device and the computer.
Part 1: Creating a wireless connection
Wireless infrastucture
If you have a wireless router (or similar), your computer does not
necessarily need to have a wireless card (it can be connected through a
network cable, for example). The computer and the device are in the same subnet coverage, so you
can simply grab the IP address from the device and connect to it. The process
of grabbing the device's IP address is explained below.
Ad-hoc connection
An ad-hoc connection connects a set of devices (in this case, your computer
and your device) on a wireless, non-centered connection. In this case you can
start the ad-hoc network from both devices. To start an ad-hoc
connection through the device:
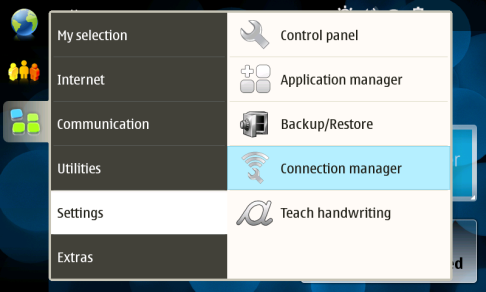
- On the device, click the menu and go to Settings >
Connection manager.
- A new window opens. Click the tab, then
Tools and Connectivity settings.
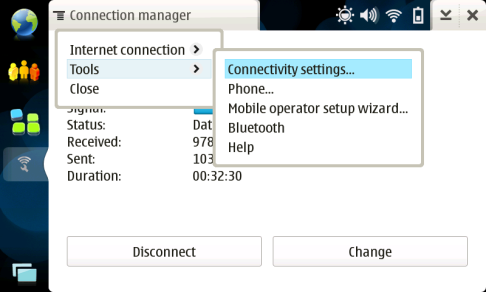
Note: You can also go to this window from the 'wireless' icon
on the status bar. Click Connectivity Settings.
- A new window opens. Click Connections.

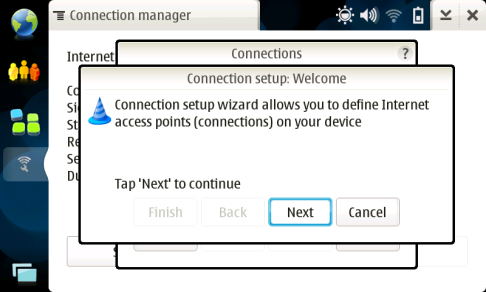
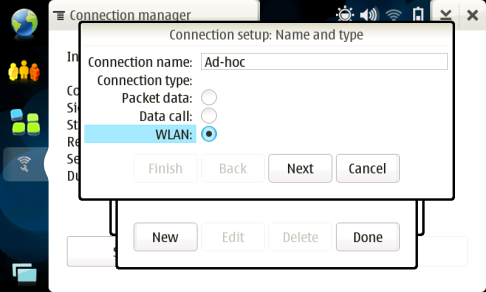
- Again, a new window opens. Choose New. A new
window opens. Click Next.
- Give the connection a name and set the connection type to WLAN. Click Next and No when asked to search for
networks.
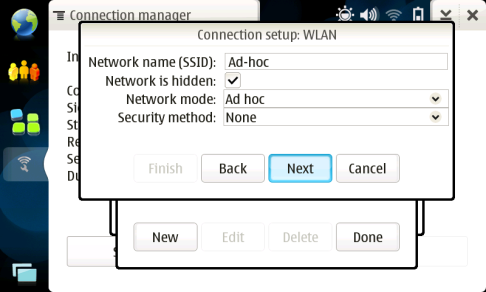
- Choose the Network name (SSID), and
mark the network mode as Ad hoc. Choose the security method you want
for your connection and click Next.
- Click Finish to conclude, Done to close the previous
window, and then OK to close the other window.

- Now, in the Connection manager window, click Select
connection, select the ad-hoc connection you just created, and click Connect.

Grabbing the IP address from your device
Your device is now connected to a wireless network. It is time to grab its
IP address in order to connect to it via SSH as explained below.
- On the device, click on the menu and go to Settings > Connection manager.
- A new window opens. Click the window tab and go to
Internet connection > IP address.
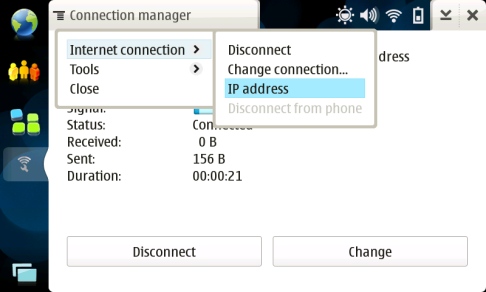
- A new window opens. Write the IP address down.
Part 2: Installing osso-xterm and ssh from maemo diable repository
X terminal
In order to install the 'osso-xterm' application, you need a working Internet
connection on your device. After connecting to the Internet, follow these
steps:
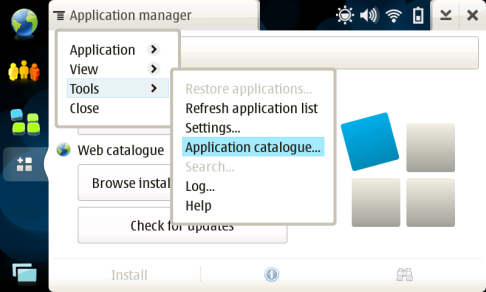
- On the device, click the menu and go to Settings > Application manager.
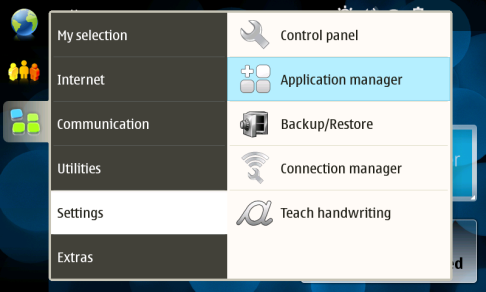
- A new window opens. Click the tab and go to Tools > Application catalogue.
- Click New and fill in the following data:
- Catalogue name: Maemo Diablo
- Web address: http://repository.maemo.org
- Distribution: diablo
- Components: free non-free
- Disabled: leave unchecked
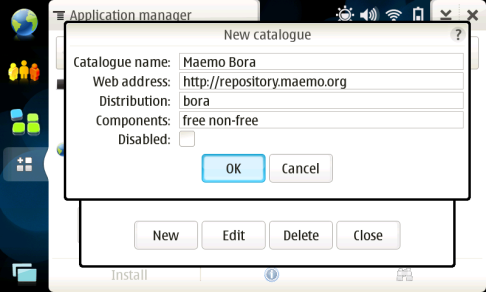
Click OK and Close to return to the main window.
- The device asks if you want to refresh the package list. Click OK.
- Now click Browse installable applications > All,
select osso-xterm, and click Install.
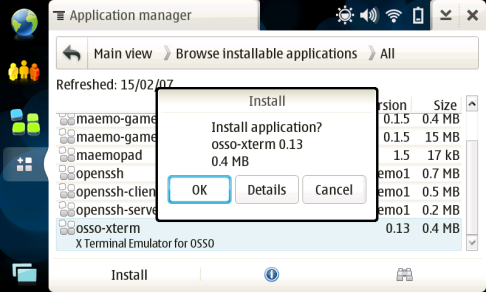
Osso-xterm is now installed on your device.
SSH client/server
In order to install the ssh client/server, the maemo diablo repository must have been added and osso-xterm installed.
- On the device, click the menu and go to Utilities > X Terminal.
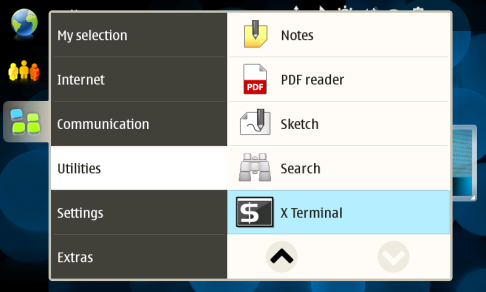
- The application opens and you will be logged in.

- Run this command to become root and to get privileges:
$ sudo gainroot
- Now you are logged in as 'root'. Install 'ssh' using the apt-get
command:
$ apt-get install -y ssh
- Now you have installed both ssh client/server applications. They do not
have a graphical user interface (GUI), even though you can use 'SSH' and 'SCP'
commands from the terminal (these are explained below).
Part 3: Connecting to the device via SSH/SCP
Creating a remote shell connection to your device
Now that you have a connection between your computer and your device,
it's time to create a secure shell (SSH) connection between them. It
enables you to download and upload files and also work on the device from
your computer, from a remote shell. Run the following command on your
computer:
$ ssh root@<device_ip_address>
Note: Password: rootme
This remote shell allows you to create, execute, modify, and access
files on your device. You can, for example, execute your application on
the device remotely from your computer and check for console output at
the same time you have the 'hello world' window open on the device.
Transfering files between your computer and your device through SCP
SCP is a tool used to copy files from one device to another, through a
secure remote connection. You can send or receive files from this.
In general, the SSH-server acts as a daemon for incoming connections,
so you will not be notified if someone wants to connect to your computer
(but log-in access is, of course, needed). Run this command to send your application to
the device from your computer using SCP:
$ scp helloworld root@<device_ip_address>:~/MyDocs
You can also make the invert: copy a file from the device to your computer, as in this example:
$ scp root@<device_ip_address>:~/foo.txt .
The file foo.txt is saved in the top directory where you are at the
moment. Your application is now installed in the device, but not yet ready for
execution. In order to execute it, open X-terminal on the device
and run this command:
$ run-standalone.sh <folder>/helloworld